Interview Articles SHFiguarts & SHMonsterArts Special Effects Diorama Workshop 1st "Gamera, Howling in the Building Street!"
2018-11-29 14:00 Updated
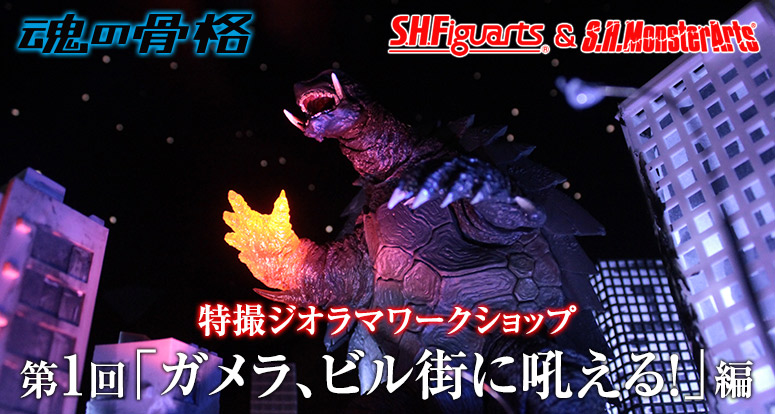
A workshop for taking cool diorama photos with a special effects taste using the special effects characters of SHMonsterArts and SHFiguarts has finally started!
The first installment to be commemorated is "S.H.MonsterArts Gamera (1999)" released on October 27th.
Imagine the scene that appeared in the night view of Shibuya, let Gamera appear in the diorama of the building city!
- The 0 th
Special effects diorama workshop starting! - 2nd
Orb Origin, flying the sea of clouds! - NEW3rd
3 types of machine dragons, live in the sea of sunset!
* When using cutlery, tools, paint, adhesive etc, please read each instruction manual and use it correctly, so please be careful not to get injured or accident etc.
※ We do not accept inquiries about the tools and materials used in the article.
* When processing such as painting products, please go at your own risk.
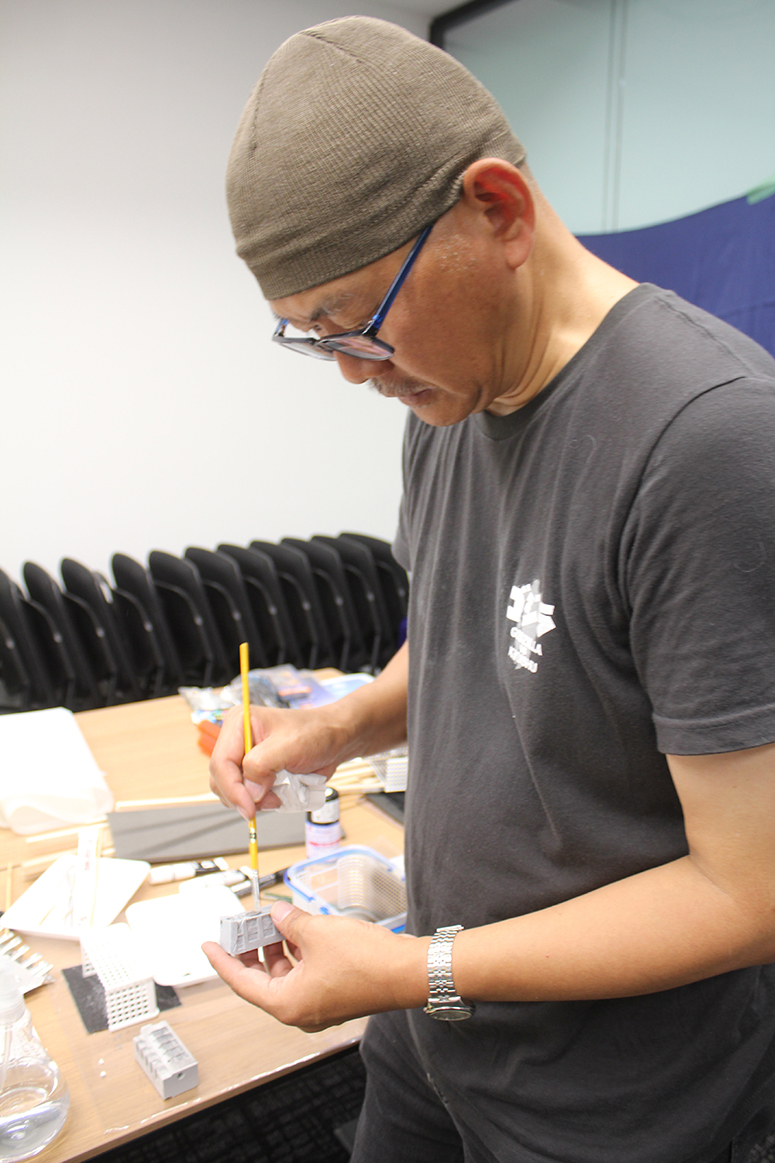
■ A professional miniature art of monster movies teaches!
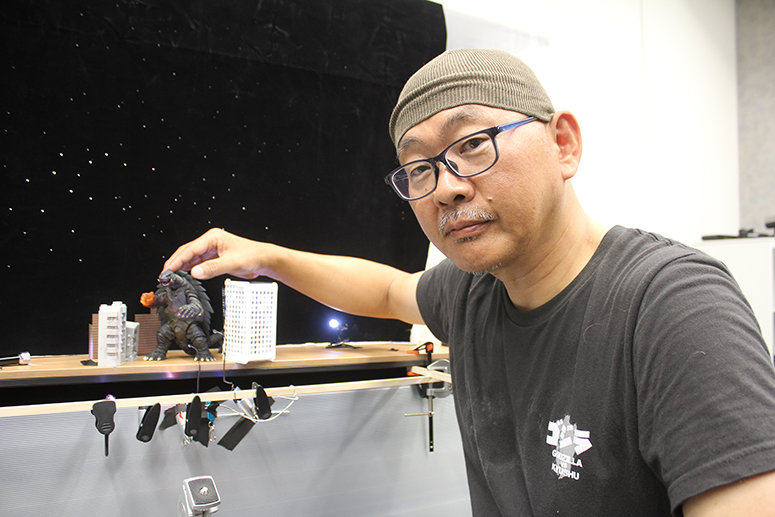
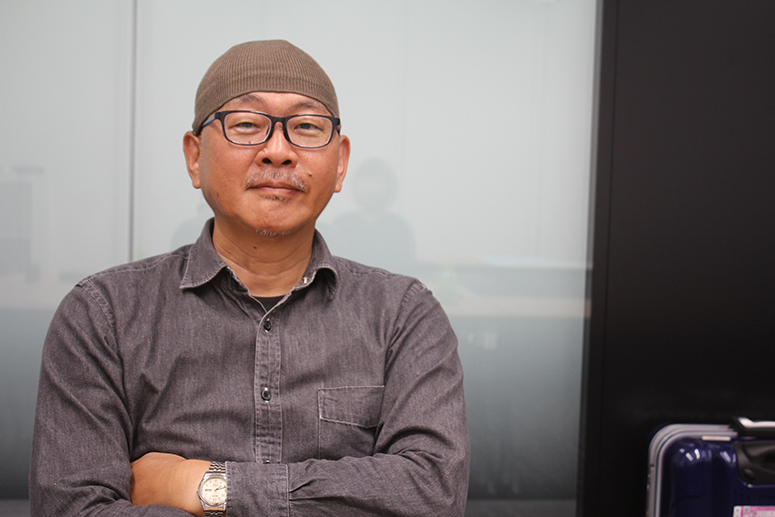
The instructor is Mr. Toshio Miike, a special art designer at the Tokusatsu Institute!
He is a great veteran who has worked on numerous special effects movies such as the Heisei Gamera trilogy and the Millennium Godzilla Series.
By passing through the frame of the camera, let's see the technique unique to professional effects, where "special effects pictures" are created!
■ Make a building with accessories!
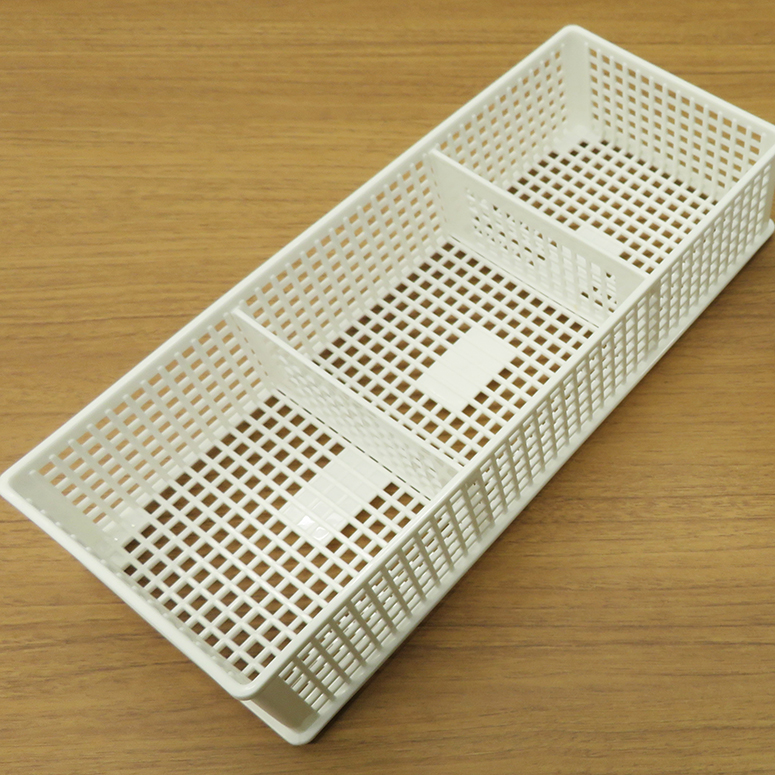
It is the theme of this workshop to make diorama with things that are available at hand!
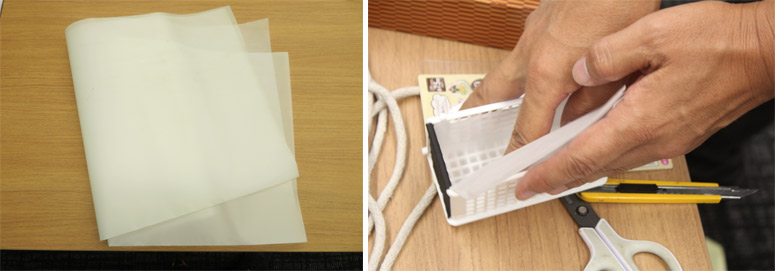
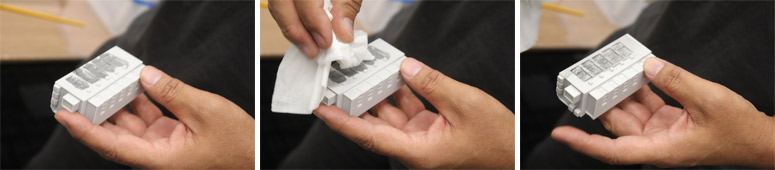
First of all, I will make a building using a plastic accessory box which can be obtained at a 100 yen shop.
First of all, let's make a slightly larger accessory size that fits the gamera exactly.
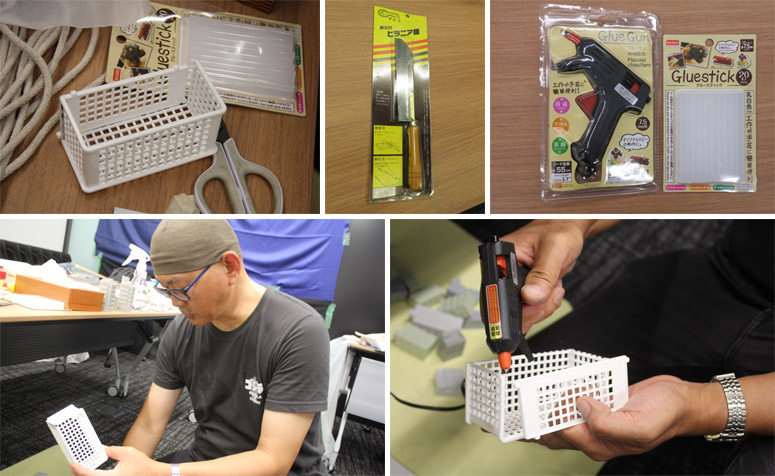
Cut using a small saw "Piranha saw".
Piranha saws are sold at 100 yen shops and hobby shops.
Using a glue gun (price 200 yen) bought at a 100 yen shop, paste the cut parts into a box.
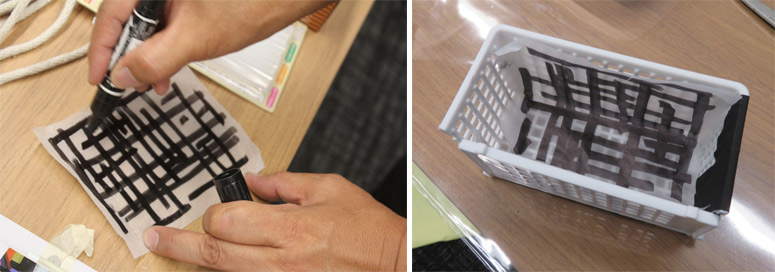
From here on, devises to show the grid pattern of accessories to "window"!
Cut the tracing paper so that it can be stuck on the inside of the building, and draw a random latticework pattern with magic.
Do not worry about the details here, it is the trick to draw boldly!
I will draw it with a guide that fills more than half of the windows.
Once you can draw it, fix it with tape inside the building.
This completes the glove compartment building.
The pattern drawn on the tracing paper will be used as a representation of the randomness of the window after a while.
This is exactly the same technique that is also used in building miniatures at special effects scenes!
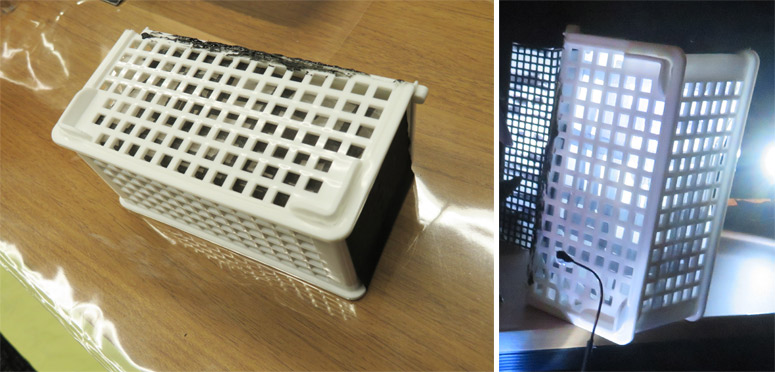
In the case of a white accessory case, it may be transparent if light is applied from behind, so it is best to blow a black spray once from the back.
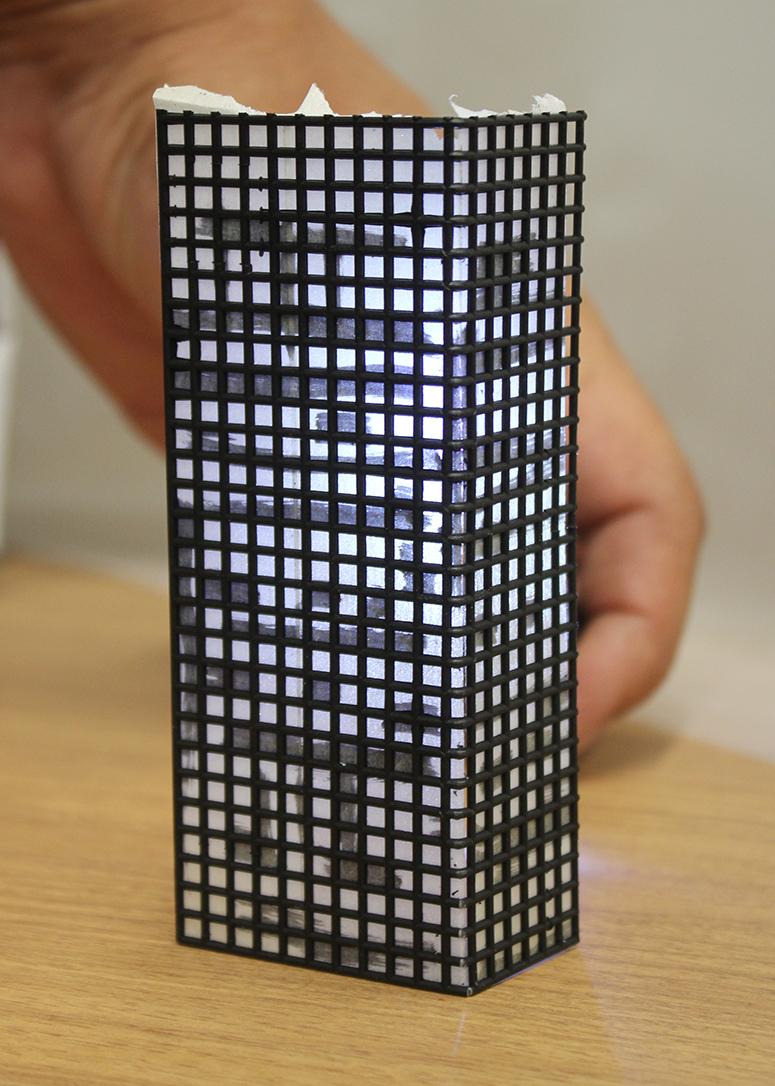
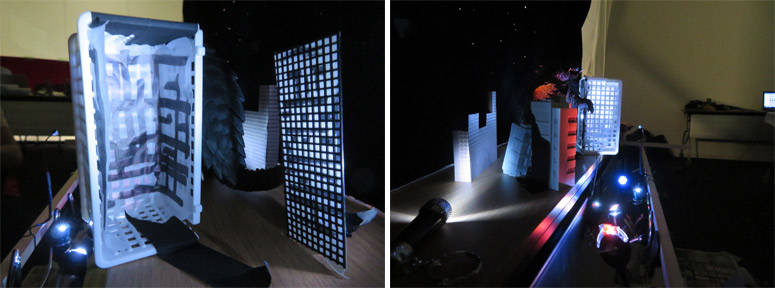
■ Make a building with a pot bottom net!
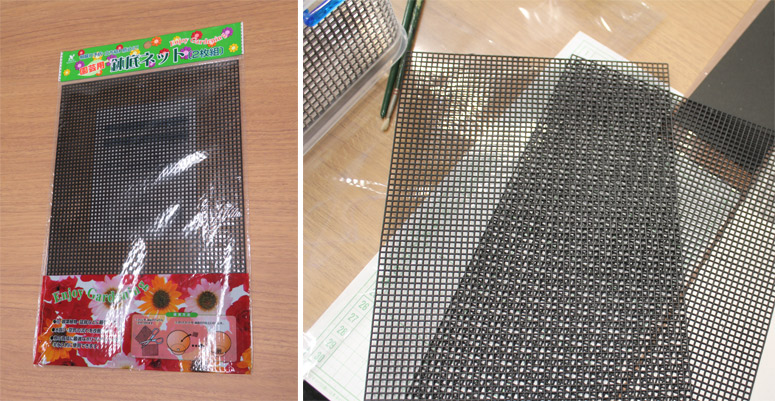
Create a building using the plastic bowl bottom net bought at the 100 yen shop!
It is a wonderful place for eyes.
Cut the net to an appropriate size, fold it into an L shape and shape it into a building.
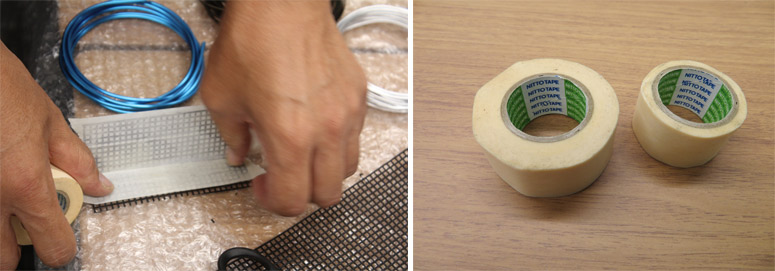
On the back side, paste the masking tape this time.
Since light can pass through, it produces effects similar to tracing paper.
It is easy as it adheres to the wall as it is a tape.
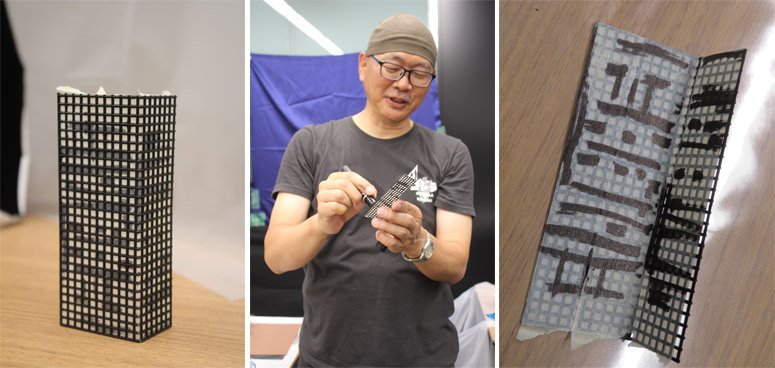
Even here, it paints randomly with magic and expresses the change of the window light.
It is a simple building with only two faces, but only two faces always appear in the picture if devised even by arrangement.
Since we assume the composition of the aori looking up from the bottom, the ceiling is omitted.
It is an idea unique to special effects that only makes a place to capture!
■ Make a write-off building!
Even in the scene of special effects, the town that can be seen at the far end of the screen is a picture drawn on a plywood board.
In the depths of the miniature, putting this "write-off" expresses the depth of the screen.
In this desktop special effects, introduce how to make write-dividing easily!
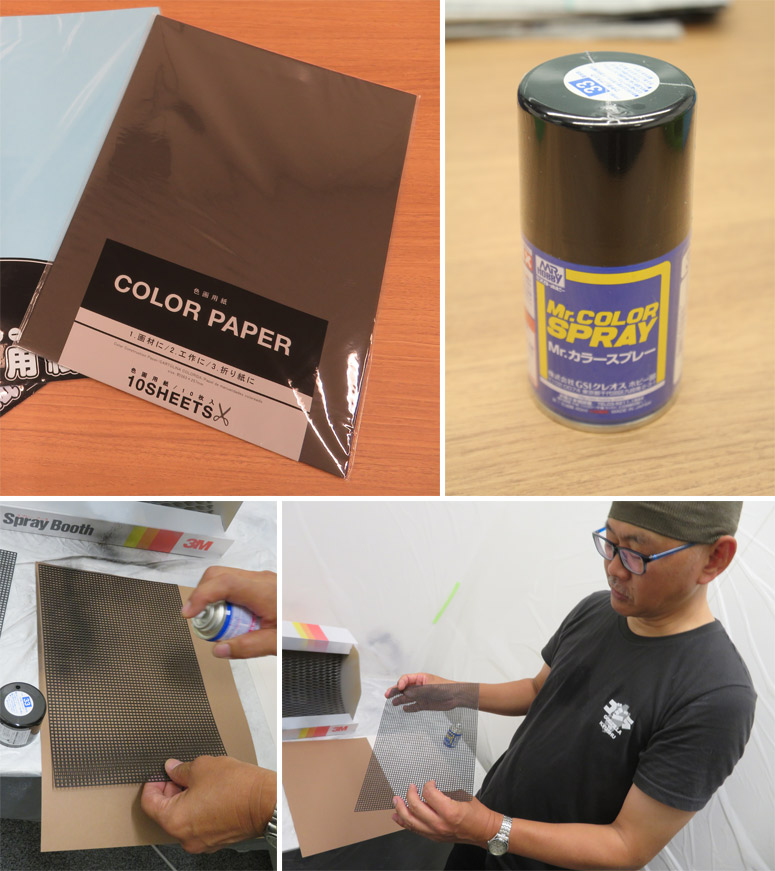
Brown color drawing paper and ... ... again, appearing in the bottom net.
Place the net bottom net on the color drawing paper and spray the black spray.
Since there are uneven surfaces and flat surfaces, let's use the flat surface down.

When I remove the net, there is a grid pattern on the color drawing paper.
You already understand? This is a representation of the window of the building.
The trick is to keep changing without blowing evenly and uniformly!
And once you blow the spray, slightly slip the position of the net and try to blow it again.
Then you will be able to express a feeling like a window frame with a stereoscopic effect.
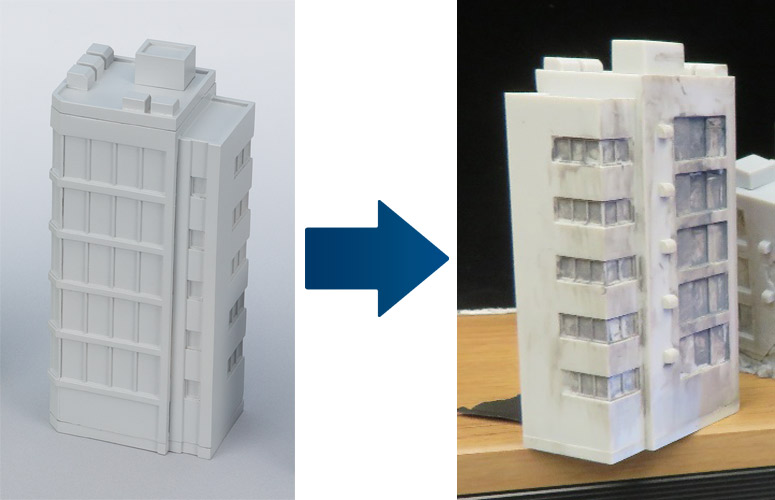
■ Paint off-the-shelf buildings!
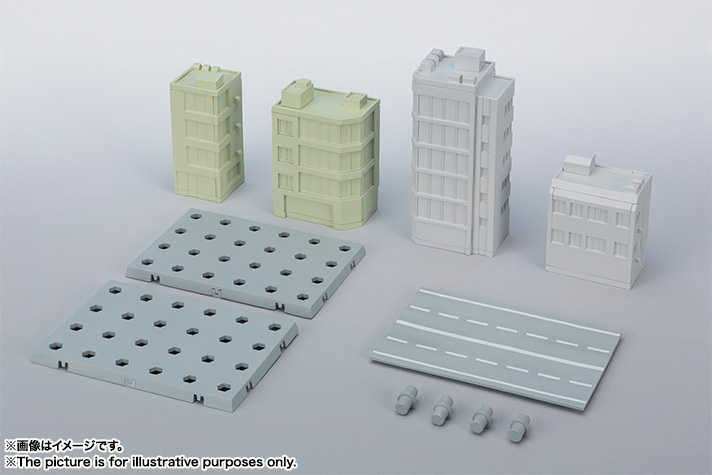
Speaking of building miniature, there is also "TAMASHII OPTION ACT BUILDING".
Let's add a simple paint and make it more realistic.
If you can get effective in a short time, smearing method is effective!
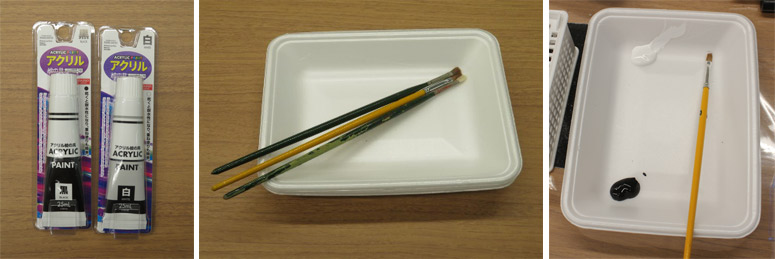
Prepare acrylic paint and brush.
Roughly paint with a toned acrylic paint around the concave part, and wipe the surface with tissue etc., paint will remain in the groove part.
A little paint remains on the surface, but this is also effective as a dirty paint with this!
Of course, if you have time, it is best to paint carefully.
Let's make street lights!
Let's make your own street lights for accent of picture making!
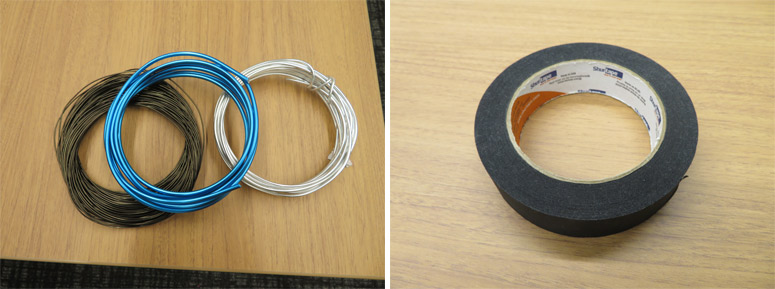
We prepare aluminum wire and black perma cell tape, glue gun which appears again.
Black permaceles are available at camera specialty stores.
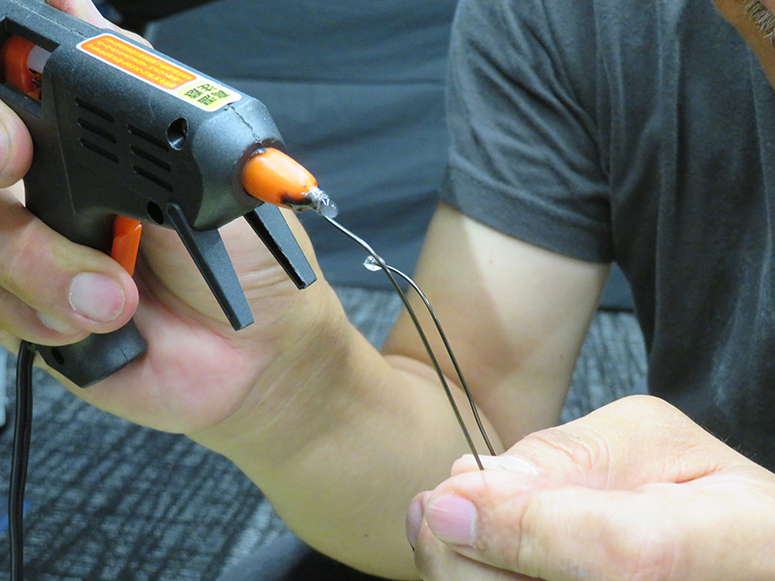
Adhesive melted with glue gun is pointed to the tip of aluminum wire gently folded to 90 degrees.
Let's attach it so as to wind around.
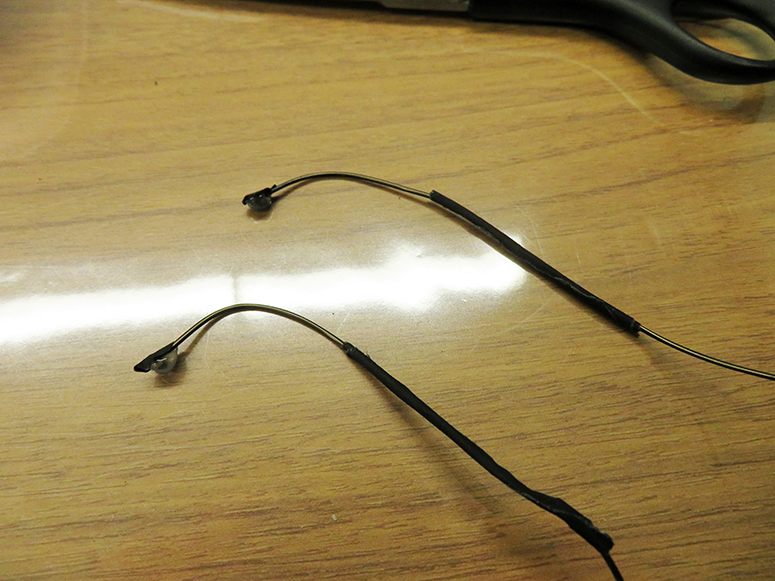
Once set, make an umbrella with black tape and arrange it like a street light.
By wrapping a black tape around the pillar part, you can express expression that the root becomes thicker.
Although it does not itself shine, it expresses the light emission by hitting light from outside when shooting.
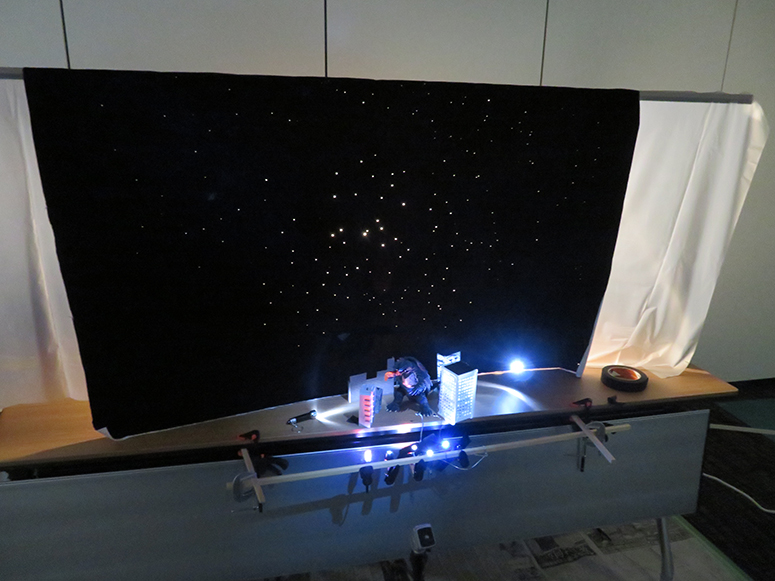
■ Let's make Starry Sky Horizont!
Another thing before shooting! Let's make the background sky.
This time, I challenge the starry sky as a night view.
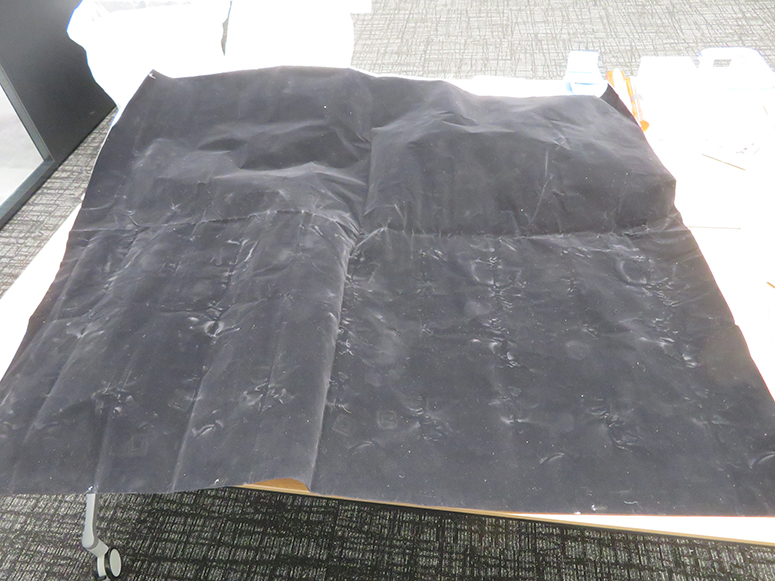
I prepared black wool paper. This is a paper whose surface is brushed and is designed to prevent light reflection as much as possible.
In general it is hard to get in, so you may substitute black drawing paper etc.
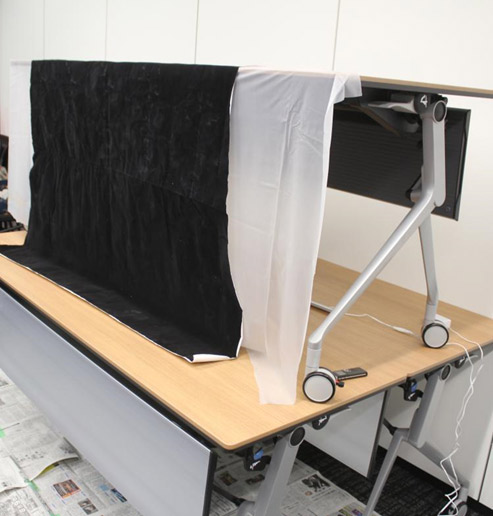
A semitransparent plastic hangs on the back of this, basic setting.
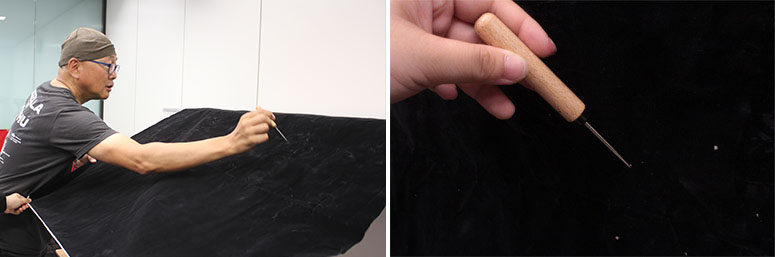
While assuming the position of the star in the frame, I will puncture holes appropriately with eyelets.
Lay out the miniature!
The miniatures are ready, the layout is finally over!
Firstly, after placing the main character, decide the frame of the camera,
We will lay out the building and so on so that it can be seen on the screen.
The idea of decorating the city in the frame rather than cutting it with the frame after placing it!
Let's lay out the camera while fixing the camera with a tripod etc. while checking the frame.
For this time, I am framing a little taste to emphasize the huge feeling.
The tips on the layout are "big building in front and small building in the back."
It is a layout technique unique to special effects art, which produces a perspective in a pseudo manner.
The street light in front will further emphasize the perspective.
Two street lamps that are only shifted up and down are wonderful to see in front and back in the screen!
Let's put a write-off building in the back.
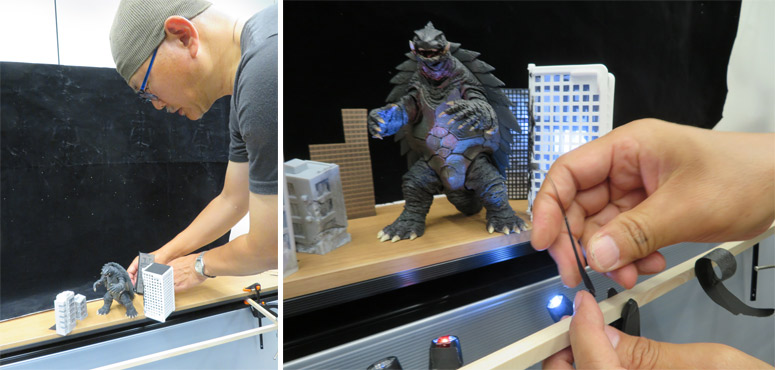
■ Let's write!
This time, because it is a night view, lighting is stiff!
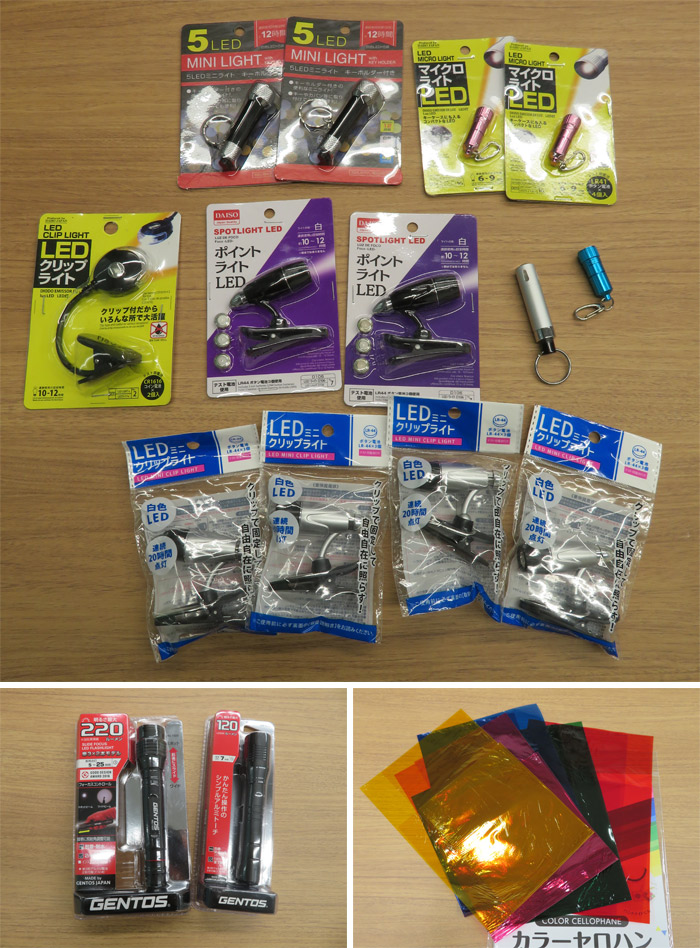
We use LED lights that can be bought at a 100 yen shop, and pen lights that can be obtained at an electric store.
The color cellophane prepared to color the lighting.
It will melt with heat when used for ordinary lighting fixtures, but it does not generate heat as LED, so OK!
If you hit it with a big light, the whole will be bright and it will not be a night view mood, so it will be NG.
It is a point to make small town lights with small lights like this!
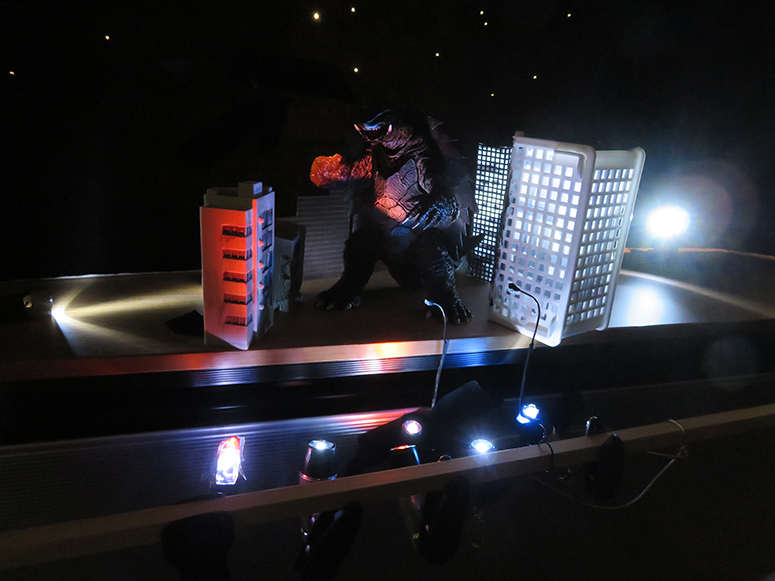
And since it is an image being illuminated with city lights, it is a trick to hit from below.
This time, the square material is fixed to the front for lighting. This makes the light easier to fix.
In the image of a burning city, some lights are red cello.
I also write from the inside of the building with the image of the window light.
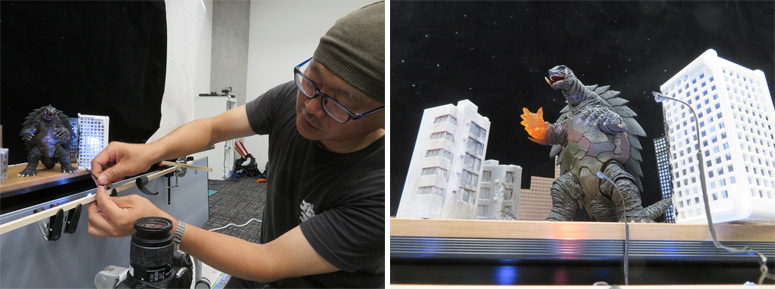
Let's light the street light with pinpoint!
■ Let's shoot!
Now it's time to shoot!
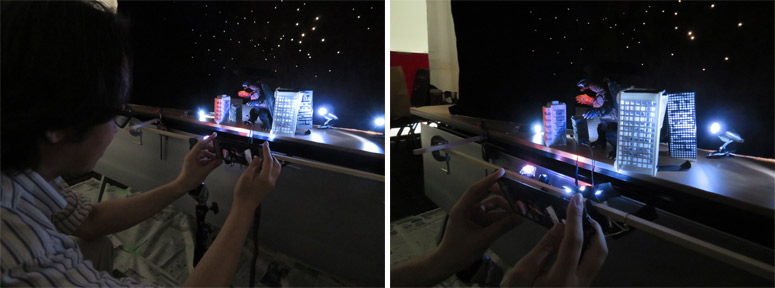
Even smartphones OK!
It is best to take a picture with a wide angle so that the focus is as close as possible to the back of the screen.
As the background blurs, it looks like a miniature.

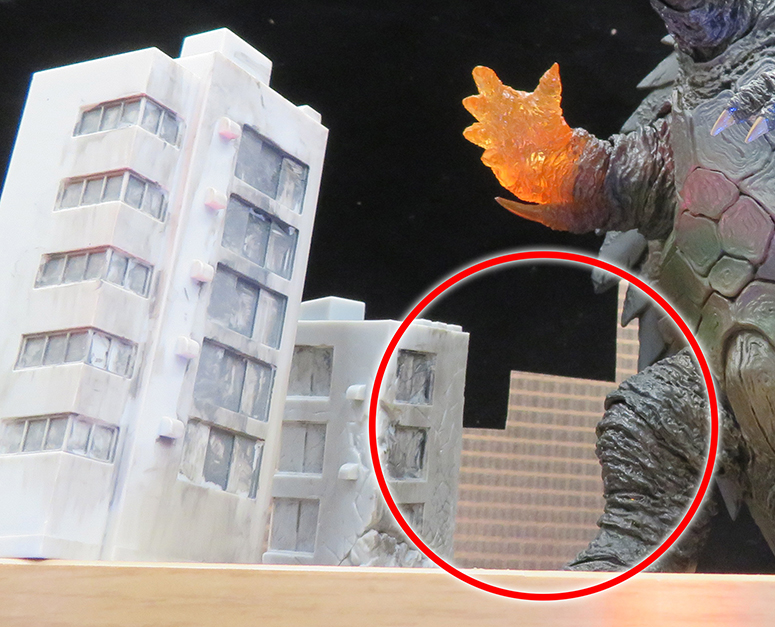
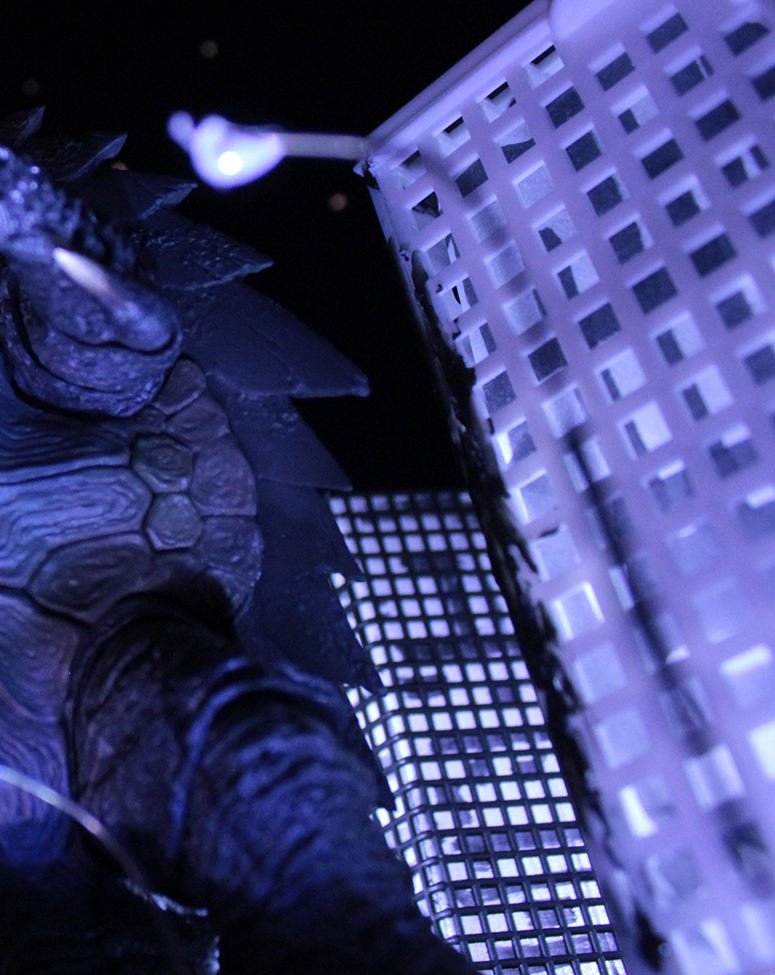
The picture taken is like this!
In the composition of Aori and the layout of the building, perspective and gigantic feeling are emphasized!
It seems that the street lights are emitting light with the light hit at pinpoint from the outside.
Also pay attention to the perspective of streetlights!
The fineness of the mesh eyes of the net-bottom net building seems to be a real distant building, is not it?
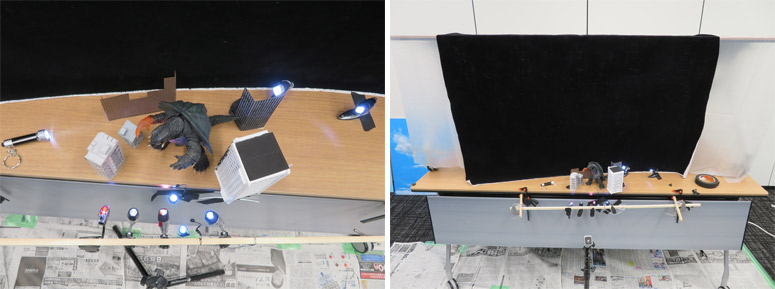
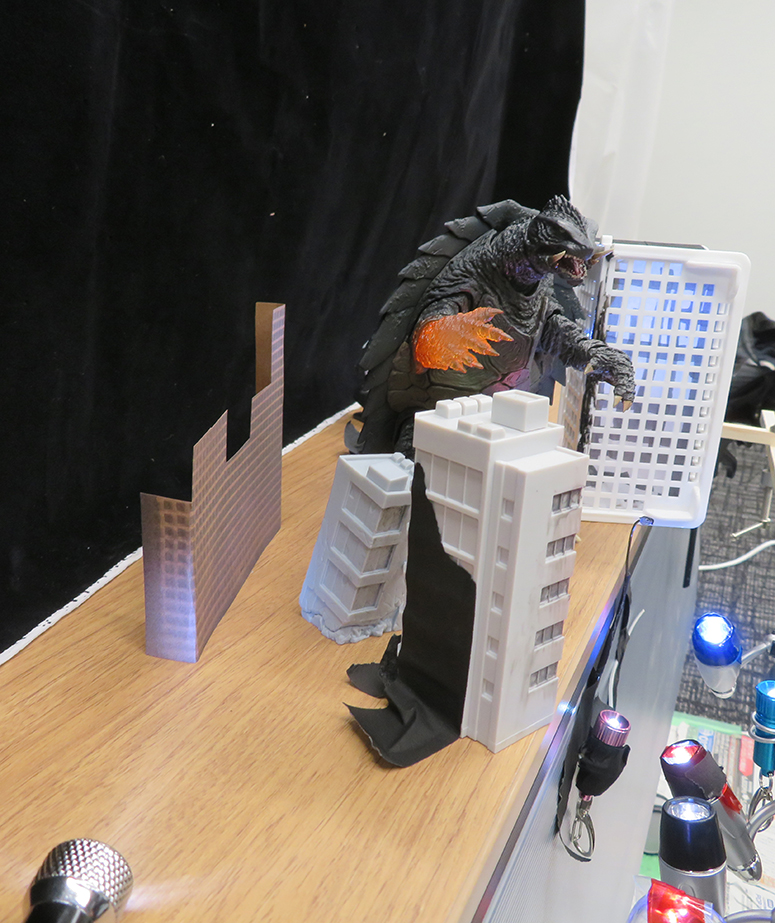
The arrangement of miniatures is actually like this.
Actually, the depth is also an extremely narrow diorama, but it is finished in a photo that makes you feel the depth with layout magic unique to special effects.
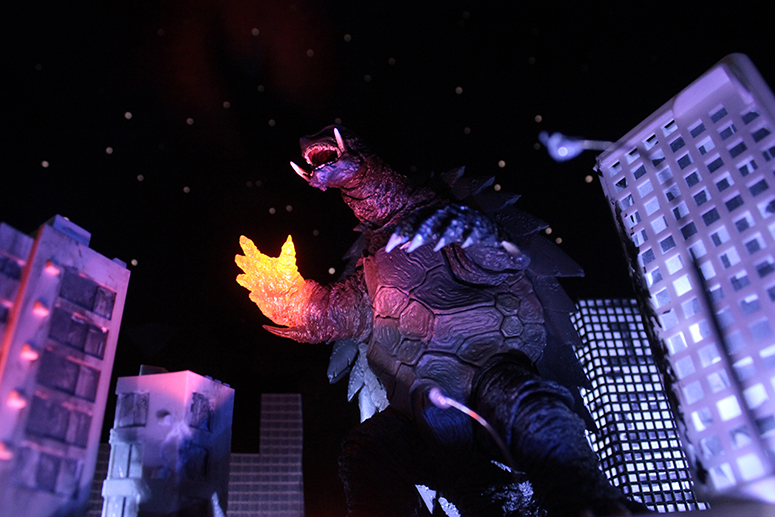
I exchanged arm parts and took a burnishing · fist version as well.
By writing also to the hands of clear molding, the image that is emitting like this!
I made a stage with great pains, so let's take another character!
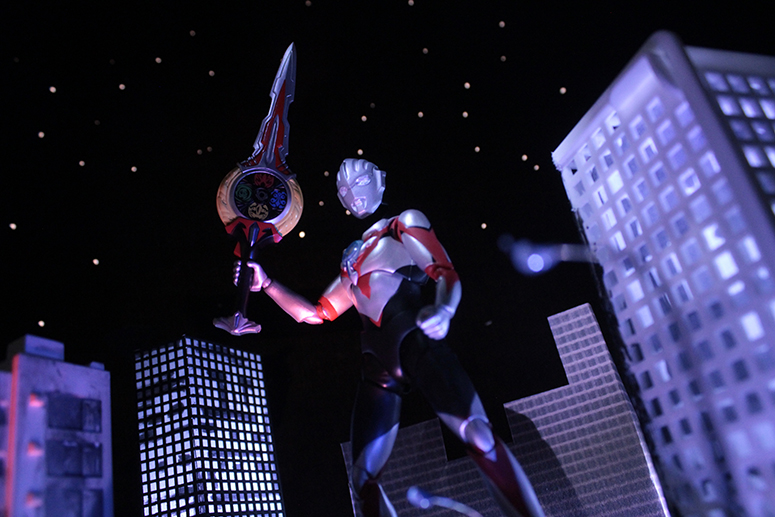
© Tsuburaya Productions ©ウルトラマンオーブ製作委員会・テレビ東京
This time, I also took pictures at S.H.Figuarts Ultraman Orb orb-origin.
It is a point to write so that the eyes will go to the face of the character and also to the weapons here.
The building was also slightly rearranged.
■ Let's do it on a stormy night!
Another contrivance this time!
I also mix the images of the scenes in Kyoto and add the image of Arashi.
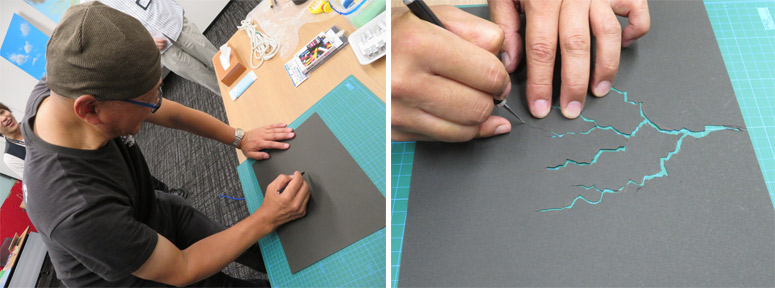
I prepared a black drawing paper and a design knife.
I will cut out with a design knife in the form of a lightning bolt.
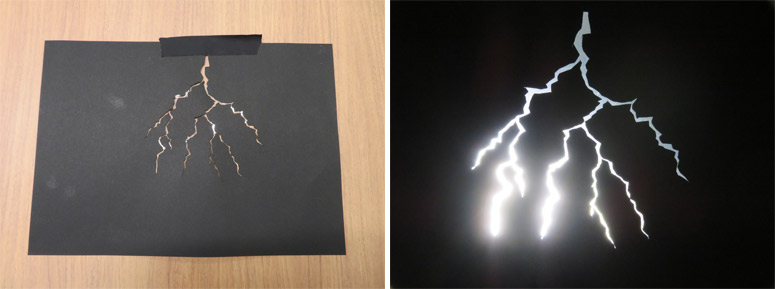
When finished, lighting from behind and shooting.
Let's synthesize this material into the photo of the previous one!

When synthesized it looks like this!
Although you can add it on a computer, if you take a material with transmitted light like this,
The way of bleeding light is nothing like optical synthesis, it becomes a special effect chic lightning bolt.
* Optical synthesis ...... Synthesizing technology of video, also called optical synthesis. A method of processing synthetic films by processing films, such as combining multiple photographic materials on one screen. Digital synthesis is the mainstream in contemporary special effects works.
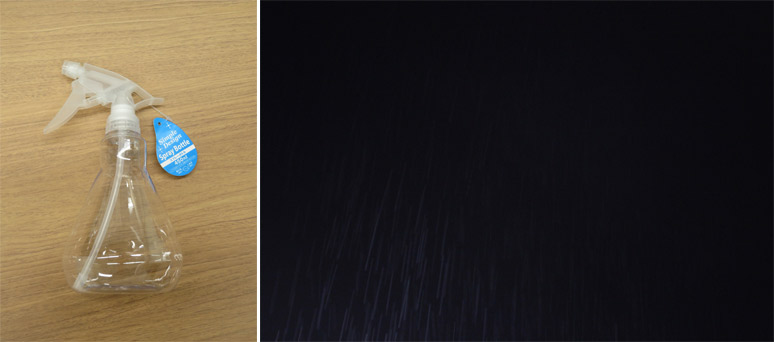
In addition, I shoot rain material that I got rushed by misting before black back.
When taking a picture, it is a point to light the water towards the water and only light rain.
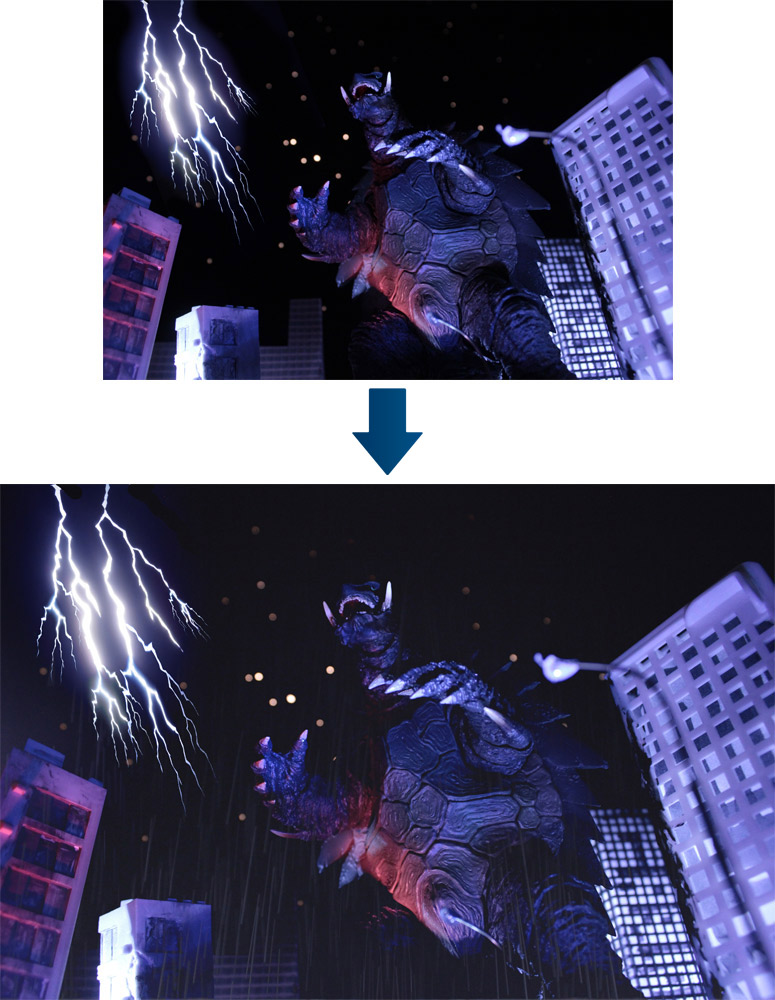
When rain also synthesizes, it looks like this!
Those who remember in the arms, it seems fun to try various processing on the digital!
■ INTERVIEW Toshio Miike PART 1
- Congratulations!
Well it was fun! I forgot the time.
- Can you tell us about the concept of this diorama workshop?
I wanted to make it seem that as many people as possible would try to do something like this. So, I try to make something that is not special, which you can get at a 100 yen shop or home center.
- The diorama of this time was fresh to decorate the city in the frame of the camera.
Usually I think that diorama is made so that it can be formed as a work regardless of wherever you look from all directions, but what we see through the lens is that we are working with special effects. This time, I tried to bring that idea into a diorama by doing what he meant unique to the scene of the special effects.
- That is the first time you get through a lens diorama!
Yes Yes. For example, if it is a diorama in this building city, we put a big building on the front, put a small one in the back, and emphasize the perspective. This is also the basic idea of special effects art. By passing through the lens, you feel a sense of air and depth. But, if the line of sight is out of sight from the lens a bit, it is actually a scarpa.
- It feels like a special effects video magic!
That is accumulation for many years (laugh). As a looking-up point of view, buildings will not enter much in sight? Therefore, even a small number of miniatures is established. On the contrary, what is important when you are at Aori is that the sky is enough. So, we prepared the wool paper for the background widely this time. Even in the scene of special effects, the ceiling will fall when you turn around in the set. In some cases, I will also put a masterpiece on the set ceiling. In 'Gamera 3', it's like cutting gamera coming down in Shibuya with true tilt.
- The way to make a building is also devised.
I tried various things such as "I can do this" using familiar things. This time I aimed at the night view, so I'm assuming that I will prepare lighting. If you use a 100-yen shop accessory box or a bowl bottom net or something that regularly has a square missing, it looks like a building. I put a tracing paper on it, and when I hit the light from behind, it looks like a window light.
- Easy-to-use write-down building also helps out the depth.
It's a technique I used quite a lot when I was an art designer for Super Sentai Series. Television production is a battle of speed, so for the building in the distance, I used a pattern paper on a styrene board and sprayed black spray onto two sides of the windows. It works quite well as a miniature for a distant view. The idea that it is better to have it than not. This time, I made it with a single sheet of paper, but if you add a little unevenness to it, shadows will appear and you can create a more three-dimensional effect.
- The street light placed in front was accented.
With that size, even if you do not turn on the light bulb, if it is round, it will look like it. Because it does not shine itself, I'm hitting light from the outside, but this is quite what I can do at the special effects scene. Maeser car in the era of Kawakita Koichi's director was charging parabola with an electric decoration, but it is not enough light intensity so hit it with light from the outside.
- Expression of the starry sky and lightning, analogue expression is fresh in reverse.
I think that it can be done entirely with digital processing now, but it is a dare analog method (lol) that it can be done in the field. I also tried the method of the optical synthesis era where thunder also takes material and adds afterwards. I guess this area is interesting if you can try out various methods.
- Where is Mikei feeling fun of special effects using miniatures?
It's fun to do the process of gradually getting along with doing something like saying "Oh, is not it, not even" at the work place. I will definitely get better as long as I do it. Satisfaction of doing it with the team is an interesting place of miniature art. So, although dioramas like this one can be done by individuals, of course, I think that it is interesting to do it with parents or children with a sense of summer vacation and to do with friends. While doing that, perhaps, some people may come out to demonstrate a tremendous talent ... I have done with my wish.
- Thank you also for your next workshop!
Special effects diorama workshop,The second bullet "Orb Origin, Flying the Unkai!" Article is here
Toshio Miike(Miku · Toshio)
Born in 1961. As a special art designer, he works on a number of special effects works.
Currently belonging to "Sci-Fi Institute".
Representative works: "Jetman", Heisei Gamera Trilogy, Millennium Godzilla Series, "Giant Warrior Appears in Tokyo", "Attack on Titan", "Shin Godzilla", "Guardian of the Spirit", "Sukagawa" G work / (provisional name) Godzilla Appears in Sukagawa".
As a special effects director, he also works on "Daimajin Kanon" and "Ultraman Saga".
 |
S.H.Figuarts The "pursuit of character representation by the movable" to the theme, is "modeling" "movable" Standard figure series of palm-sized condensed the technology of the "colored" Toara loose figure. |
 |
S.H.MonsterArts An action figure series featuring monsters, using the movable action figure technology cultivated by S.H.Figuarts. This is S.H.MonsterArts. |
©KADOKAWA 徳間書店 日本テレビ 博報堂DYメディアパートナーズ 日販/1999
Attention
- Images are for illustrative purposes only.
- Products may differ slightly from the images and illustrations shown.
- Please note that products that have been on the market for some time may no longer be produced or sold.
- Information on this website, such as product names, release dates, and prices, is subject to change.
- Product release dates refer to their original release date in Japan. If you are looking for release dates outside Japan, please check with a store in your region.
- If you cannot find information about the status of a product, please inquire with your local retailer.
- This website includes Tamashii Web Shop products shipped after July 2012.
Note that some products sold by TAMASHII NATIONS will not be listed on this website. - This site lists previously released products with the new tax rate (10%) that would apply if purchased in stores today.
Please note that the listed price may differ from the initial release price (which applied the previous tax rate). - The price listed reflects the manufacturer's suggested retail price including consumption tax.
- The price on Tamashii Web Shop reflects the retail price including consumption tax.
- The "Buy Now" button that appears when a Tamashii Web Shop item is available for purchase is a service that allows you to add the desired item directly to the Premium Bandai cart. It may not function due to Premium Bandai maintenance or your device settings.
- If Premium Bandai experiences heavy traffic, pages on the website, as well as the "Buy Now" button, may not display properly. If this happens, please try again later.
- If you are using an iPhone, the "Buy Now" button may not work for you outside of Japan. Turning off "Prevent tracking beyond this site" in your browser settings may remedy the situation.
Rate This Page
Did you find this page useful?
Leave a comment: